
One in five Vancouver homes reports toilet-related water damage within a decade, and many of those start with a small wet patch at the fixture. That single fact shows how quickly a minor seal issue can become an expensive repair.
We’ll explain what a leaking toilet base means in plain language and why seeing water at the foot of the fixture should not be ignored. Most often a failed wax ring or loose flange bolts is to blame. Less common causes include a cracked porcelain base or a dripping supply line that mimics a real leak.
As we guide you, you’ll learn simple checks you can do yourself, when to tighten bolts safely, and when to call a plumber. If you’re in North Vancouver or West Vancouver, Lord Mechanical LTD is ready to help — call 604 670 3737 for prompt service. Our goal is to help you protect your bathroom and home from rot, mould and hidden subfloor damage.
Key Takeaways
- Noticing water at the base often points to a seal or connection issue that appears after a flush.
- Most common causes: failed wax ring or loose flange bolts; sometimes a cracked fixture.
- Simple DIY checks can rule out condensation or a dripping supply line before major work.
- Prompt action prevents water damage, mould, and costly subfloor repairs.
- We serve North Vancouver and West Vancouver homeowners — call 6046703737 for reliable plumbing support.
Why a toilet leaking base is a serious problem for your bathroom and home
Even small amounts of water around a toilet can start a chain reaction of damage under your bathroom floor.
Repeated water pooling around the fixture can wick into flooring seams and reach the subfloor. Over time this causes water damage, rot in underlayment, and weakened joists that require costly repairs.

How water pooling leads to rot and mould
Moisture trapped under finishes creates the perfect environment for mould and wood decay. These problems spread faster than homeowners expect and often hide beneath the surface.
Hygiene risks and foul odours
Standing water collects bacteria and causes persistent odours. That degrades indoor air quality and makes bathrooms unpleasant for occupants or customers.
When a small leak becomes expensive
What seems minor can lead to warped flooring, damaged underlayment, and loose fasteners that destabilize the base toilet. Water can even reach adjacent rooms or ceilings in multi-level homes.
- Act quickly: small leaks grow over time and multiply repair costs.
- Visible soft flooring or musty smells: schedule a deeper inspection right away.
- Need help? call our plumber team at 604 670 3737 for an assessment in North and West Vancouver.
Signs your toilet is leaking at the base (and not just condensation)
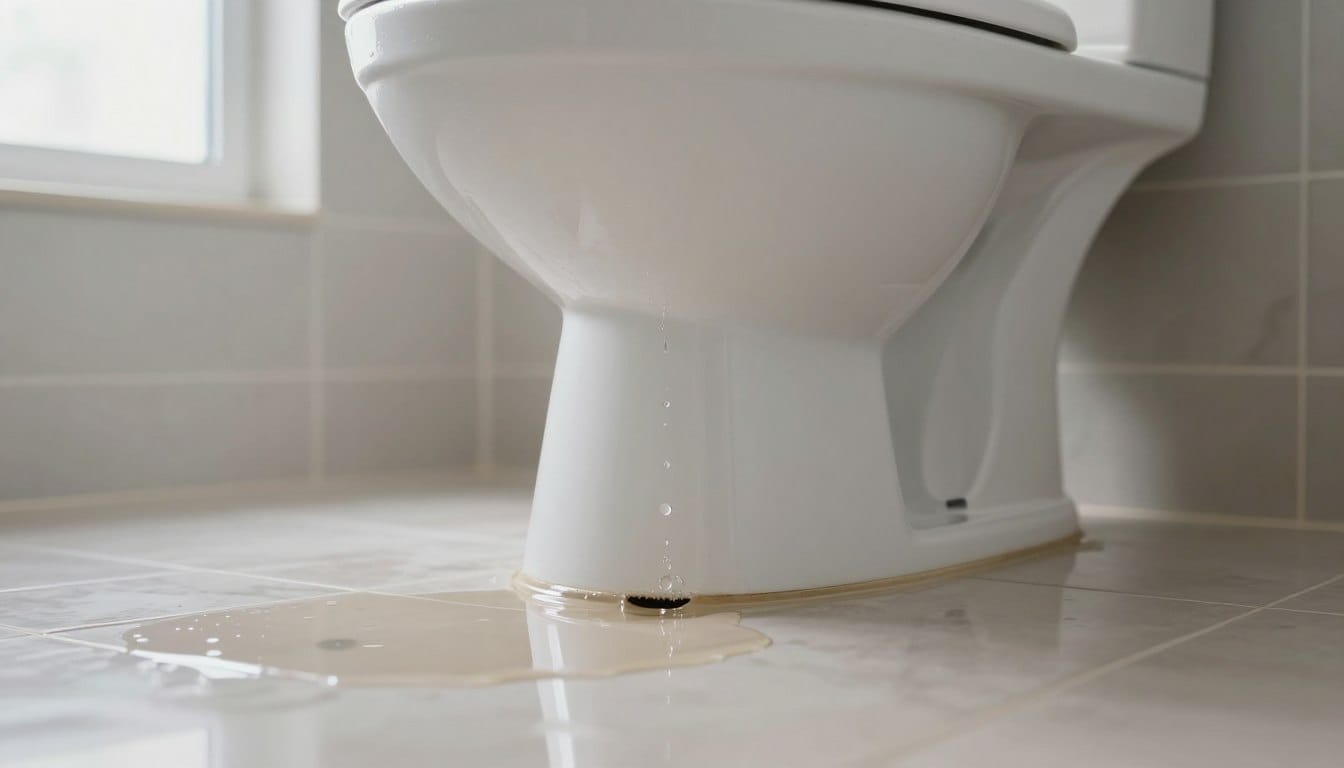
If water appears at the floor right after you flush, that points more to a seal or connection issue than to simple humidity.

Water pooling after a flush
Fresh water pooling around the fixture after you flush is the most telling sign. This usually means the seal between bowl and floor has failed or a flange connection has shifted.
Damp, discoloured or soft floor
Check the toilet floor for damp patches, staining, or soft spots. These suggest ongoing moisture intrusion under finishes and rising damage to the subfloor.
Wobbling or loose bolts
If the unit rocks, worn or loose bolts are often the cause. Movement breaks seals and lets water escape when you use the fixture.
Condensation vs a real leak
Wipe the bowl, tank and visible pipe dry, ventilate the room, then watch. If moisture returns only on surfaces, it is probably condensation. If water pools on the floor, you have a leak.
- Document timing, amount and exact spot of water.
- Safety for businesses: block the area if the floor is slippery or soft.
- Need help? Call Lord Mechanical LTD at 604 670 3737 for an assessment in North and West Vancouver.
Common causes of a leaking toilet base
A drip at the floor typically signals a problem with the seal, bolts, or supply path — not simple condensation. We’ll walk through the most frequent causes so you can spot the issue quickly and act with confidence.

Failed wax ring or misaligned seal
The wax ring creates a watertight and gas-tight seal between the bowl and the flange. Over time the wax compresses, shifts, or tears. Misalignment during installation also prevents a full seal and causes slow leaks after flushing.
Loose or damaged flange bolts and shifting connection
Bolts that corrode or work loose let the fixture rock. Movement breaks the seal and produces a repeating pattern of water at the floor, often worst right after a flush.
Cracked porcelain and urgent failures
A cracked toilet or bowl can let water escape unpredictably. Cracks may widen over time and lead to sudden, larger leaks. This is one of the few situations we recommend addressing immediately.
Supply-line drips and installation wear
A slow drip from the water supply line or valve can run down the outside of the fixture and mimic a base issue. Improperly tightened fittings, uneven flooring, or long-term wear shorten the life of a wax ring and increase failure risk.
“Start with the simplest checks first: supply line, bolts, then wax ring and flange.”
- Check the water supply connection.
- Test bolt stability and caps.
- Inspect the wax ring and flange for damage.
- Look for cracks in the bowl or base.
If advanced issues show up — damaged flange, hidden subfloor rot, or a cracked ceramic — call us at 604 670 3737 for fast, professional plumbing help across North and West Vancouver.
Quick checks to diagnose where the water is coming from
Begin by drying the area and watching closely — it’s the fastest way to pinpoint the source of wet spots.

Dry, place paper towel, then flush
Dry the floor completely and lay paper towels around the fixture. Flush the flush toilet once and watch the towels for fresh moisture.
If wet appears only during or just after the flush, the issue likely tracks to the seal or flange area. If towels get damp steadily, suspect the water supply or valve.
Inspect bolts, caps and movement
Check bolt caps for cracks and corrosion. Apply gentle pressure to the bowl — a small rock is normal; major movement indicates worn bolts or a failing seal.
If you see movement, stop the test and do not force tightening. Have a wrench and a cloth ready before trying any adjustment.
Check the water supply connection and valve
Feel fittings on the water supply line and shutoff valve for moisture. A slow drip will often trace down the pipe and pool at the floor edge.
Decision fork: if the supply line or valve is the source, begin with that repair. If water appears only after a flush and at the floor joint, consider bolt tightening or seal replacement.
- Dry and paper-towel test.
- Observe timing (during flush vs constant damp).
- Inspect bolts, then supply fittings.
“Confirm the leak source before disassembly to save time and avoid extra damage.”
If diagnosis suggests a complex issue — soft flooring, water disappearing under finishes, or flange damage — call Lord Mechanical LTD at 604 670 3737 for fast plumbing support in North and West Vancouver.
DIY fix for a leaking base: tighten bolts safely
Start by gathering the right tools so you can make a safe, measured repair without risking porcelain damage.

Tools to have ready
Have an adjustable wrench, a flat-head screwdriver, and a clean cloth. The wrench fits the nuts, the screwdriver lifts caps, and the cloth keeps the work area dry.
Expose and inspect the bolts
Remove the bolt caps carefully. Look for corrosion or stripped threads. If bolts or nuts are badly damaged, replacement is safer than forcing them.
How to tighten without cracking porcelain
- Seat the cloth under the bowl to catch drips.
- Turn each nut a quarter turn, alternating sides to distribute pressure evenly.
- Repeat small turns until the bowl feels snug. Stop when the unit is stable—do not overtighten.
When wobble continues
If the fixture still rocks, the wax ring, flange or subfloor may be the issue. Shims can help short-term on a level floor, but they don’t fix seals.
A successful result is no rocking and reduced seepage at the toilet floor. If movement or repeat leaks continue, call Lord Mechanical LTD at 604 670 3737 for a full flange and subfloor assessment in North and West Vancouver.
DIY fix for a leaking toilet base: replace the wax ring or seal
A fresh wax or rubber seal often solves low-volume seepage that bolt tightening cannot stop.

Supplies checklist
- New wax ring or rubber seal
- Putty knife, gloves and sponge
- Adjustable wrench, towels and cardboard
Safe removal and inspection
Shut off the water supply line, flush toilet and sponge out any remaining water. Disconnect the water supply line and cap the valve if needed.
Lift the toilet straight up after rocking gently. Set it on a protected surface. Inspect the flange for cracks, rust or low height. A damaged flange causes repeat leaks and needs repair.
Replace the seal and reseat
Scrape away old wax completely with a putty knife. Centre the new wax ring on the flange, lower the bowl squarely, and press down to compress the seal evenly.
- Reinstall bolts and tighten evenly—do small turns on each side.
- Reconnect the water supply line, turn water on and let the tank fill.
- Flush the flush toilet several times and check for any leaks with paper towels.
If seepage continues, flange damage is evident, or you’re unsure, call Lord Mechanical LTD at 604 670 3737 for professional plumbing repairs in North and West Vancouver.
When to stop DIY and call a plumber in Canada
If simple fixes fail, stop and call a professional. Small tools and short fixes work often, but some problems need a licensed plumber to avoid bigger costs.

Persistent problems after tightening or replacing seals
If leaks continue after you tighten bolts or replace a wax ring, the flange or subfloor may be at fault. This is a clear stop-DIY trigger.
Hidden subfloor damage, flange or drain connection issues
Look for soft flooring, sagging, stains or recurring odours. Those signs suggest structural water damage that needs inspection and specialist tools.
Cracked porcelain or unstable fixture
A cracked toilet or damaged bowl usually means replacement, not patching. Cracks risk sudden failure and greater water damage.
Get professional help: call 604 670 3737
We verify the true source, assess the flange and pipe connections, and prevent repeat leaks. Lord Mechanical LTD serves North Vancouver and West Vancouver with fast, reliable plumbing repairs. Call 604 670 3737 or 6046703737 to book service and protect your home or business.
Conclusion
Prompt attention to a wet area around your fixture stops small water problems from becoming major repairs. Over time, water can harm flooring and underlay and raise repair costs.
Follow the checks you learned: rule out condensation, watch timing, inspect bolts, the seal and supply line. For most issues, the safe DIY order is quick checks → tighten bolts carefully → replace the wax ring or seal → test with several flushes.
High-risk cases — a cracked bowl, damaged flange or soft floor — need a professional plumber. If you want it fixed correctly the first time, call Lord Mechanical LTD at 604 670 3737 (or call 6046703737) for service in North Vancouver and West Vancouver.