
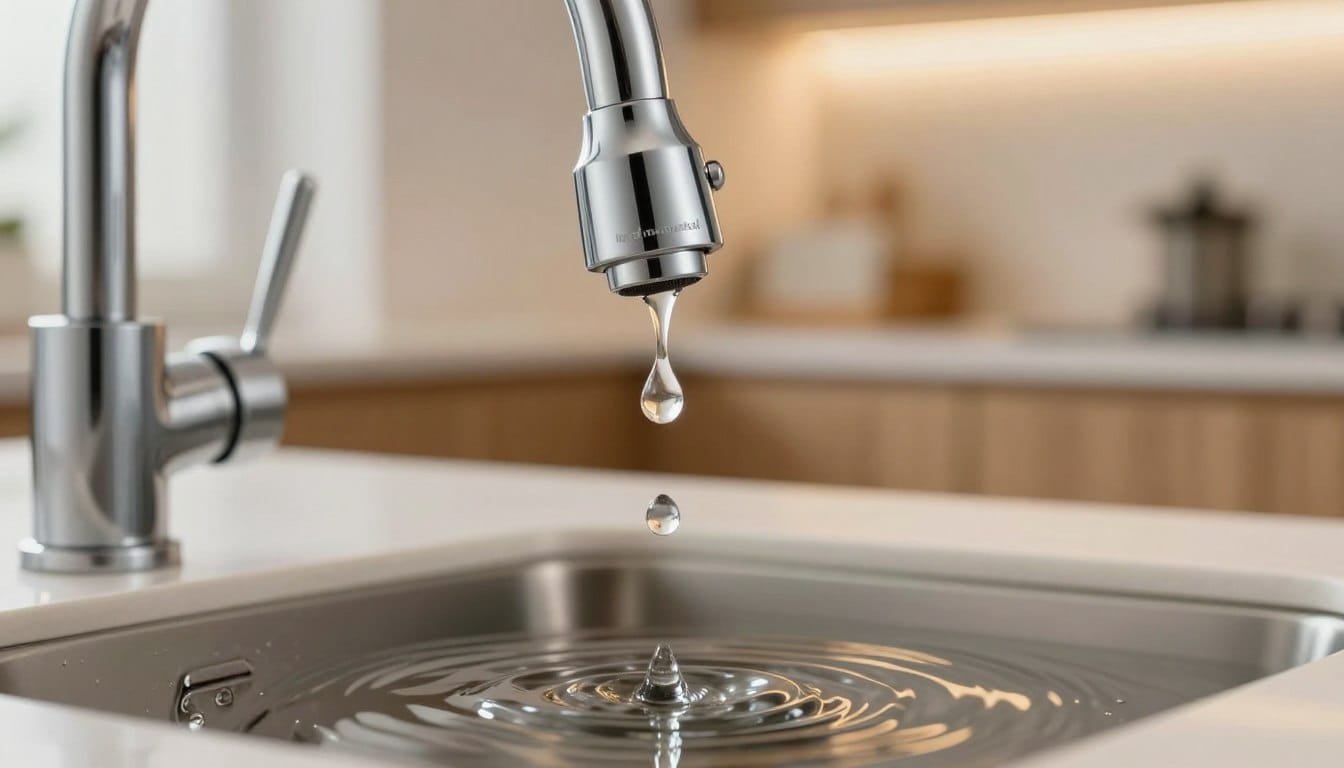
Surprising fact: a single steady drip can waste over 3,000 litres of water a year and add real dollars to your utility bill in Vancouver-area homes.
We know a leaky faucet is more than an annoying sound. It quietly wastes water and raises costs for strata, rentals and busy kitchens.
Most fixes are straightforward if you identify the valve type and worn parts—washers, O-rings, cartridges or valve seats. We explain a type-specific, step-by-step path for cartridge, compression, ceramic disk and ball-type taps.
If you prefer fast professional help, call 604 670 3737. Lord Mechanical LTD serves North Vancouver and West Vancouver and can step in when parts are seized or corrosion is heavy.
Key Takeaways
- Every drip wastes significant water and adds to your bill.
- Many jobs suit a careful DIYer once you identify the tap type.
- Check rubber washers, O-rings, cartridges and valve seats first.
- If the job drags or parts are corroded, call our team at 604 670 3737.
- We focus on practical, safety-first shutdown and reassembly steps.
Why a dripping faucet is more than an annoyance in Canada
We see small leaks as simple nuisances until the numbers make the case. A single steady drip can waste more than 3,000 gallons per year, so the impact is real for homeowners and strata councils alike.

How a steady drip wastes water and increases your bills
One drip per second adds up quickly. That lost water raises individual bills and, in multi-unit buildings, contributes to higher shared operating costs when many suites have minor leaks.
What a drip per second can add up to over a year
We translate the benchmark—3,000+ gallons/year—into a clear goal: stop avoidable waste now. Continuous flow through a failing seal will worsen as the water supply presses worn parts together.
- Small leak, measurable waste: justify fixing it today rather than waiting.
- Shared cost impact: many small leaks mean bigger strata expenses.
- Long-term damage: constant water flow increases wear and mineral buildup.
Reduce waste, restore control, and prevent staining or buildup. If you need help, call us at 604 670 3737 — Lord Mechanical LTD serves North Vancouver and West Vancouver.
Common causes of a leaky faucet and where to look first
A steady leak usually traces back to a handful of worn internal parts. We help you spot the likely culprit before you buy anything.

Worn rubber washers and seals
A washer creates a tight stop. Over time rubber hardens and fails, so water seeps at the spout even when the tap is off.
Loose or damaged O-rings around the handle and spout
O-rings and small rings sit where moving parts meet. A torn ring often causes leaks near the handle or the swivel spout.
Worn-out cartridges in modern faucets
The cartridge is the core control part in many modern designs. A worn cartridge can let water pass even when the handle is in the off position.
Corroded or pitted valve seats in older plumbing
Valve seats are the surface washers press against. Mineral-heavy water can pit the seat, preventing a clean seal until the seat is smoothed or replaced.
| Visible symptom | Most likely part | Quick action |
|---|---|---|
| Leak at spout tip | Washer / rubber seal | Replace washer, test flow |
| Seepage near handle | O-ring / rings | Change O-ring, grease joint |
| Leak when “off” | Cartridge | Inspect cartridge, replace if worn |
| Persistent seepage despite new parts | Valve seat (corroded) | Resurface or replace seat |
If you need help diagnosing or sourcing parts, call Lord Mechanical LTD at 604 670 3737. We serve North Vancouver and West Vancouver and can assist on-site.
Tools and parts to pick up before you start
Start by collecting the essential tools and exact parts — this makes fixes quicker and cleaner.
Must-have hand tools
We recommend a small kit: Phillips and flat-head screwdrivers, an Allen key, pliers and an adjustable wrench. A flat screwdriver or the edge of a utility knife helps lift small decorative caps without cracking the finish.

Helpful supplies
Bring penetrating oil (WD‑40/CRC) for seized stems and a tube of plumber’s grease for O-rings and moving interfaces. A thin coat reduces friction and extends part life.
Replacement parts to have on hand
Pack common spares: washers, O‑rings, cartridges and, for ball-type units, a full repair kit. Take the old washer, O‑ring or a clear photo to the hardware store to ensure a precise match.
| Item | Purpose | When to use |
|---|---|---|
| Phillips / flat screwdriver | Remove screws, pry caps | Handle removal, cap lift |
| Adjustable wrench | Loosen nuts and packing | Stem and valve nuts |
| Pliers | Grip small parts | Hold clips, remove old O‑rings |
| Replacement parts | Restore seals and control | Washer, O‑ring, cartridge swaps |
If threads are seized or parts look corroded, call us at 604 670 3737. Lord Mechanical LTD serves North Vancouver and West Vancouver and can help with parts matching or on-site service.
Shut off the water supply and set up your workspace safely
Begin by isolating the water supply and arranging a tidy work area to avoid surprises. We first locate and close the hot and cold shut-off valves under the sink. Turn each valve clockwise until it stops.
If there are no under-sink valves or they fail, shut water at the main valve for the building or unit. Open the tap to relieve pressure and let residual water drain before you loosen any fasteners.

Protect small parts and keep reassembly simple
Plug the drain with a stopper or a rag so no small screw or rings disappear. Lay removed parts on a towel in the order you take them off.
Take quick phone photos of each step. Photos save time and stop guesswork when you put parts back together.
| Step | Why it matters | Quick tip |
|---|---|---|
| Turn off under-sink valves | Isolates water supply to the fixture | Turn clockwise until snug |
| Shut water at main if needed | Needed when valves are missing or seized | Open tap to relieve pressure |
| Plug drain & organise parts | Prevents lost screws and rings | Use towel and numbered layout |
In a busy home, tell others you’ve shut the supply so no one turns water back on mid-job. If you prefer expert help, call Lord Mechanical LTD at 604 670 3737—we serve North Vancouver and West Vancouver.
Identify your faucet and valve type before you buy replacement parts
A quick check of handles and valve action tells you which replacement parts you need. Start by looking: is there a single-handle control or two separate handles for hot and cold?
Single-handle units usually hide a cartridge, ball, or ceramic disk valve. Double-handle setups commonly use a compression valve—especially in older installs.
Common styles and what they mean
Single-handle models let you mix hot and cold with one control. Two handles separate hot and cold flow and often indicate a compression-style stem.
Valve types in plain terms
- Compression: Older design; separate stems for hot and cold that tighten to stop flow.
- Ball: Uses a ball-shaped valve inside a single-handle body; needs a specific kit.
- Cartridge: A removable sleeve that controls flow and mix; easy to match if you note length and stem.
- Ceramic disk: Smooth, long-lasting cylinders with neoprene seals.
Tip: Take a clear photo of the unit and any brand markings before you shop. That prevents buying a “universal” part that won’t match the stem or valve interface.
If you’re unsure, call us at 604 670 3737. Lord Mechanical LTD serves North Vancouver and West Vancouver and can identify the exact type and suggest the correct parts.
Find the leak location to choose the right fix leaky faucet approach
Pinpointing the leak source turns guesswork into a clear action plan. A quick check of where water appears will tell you whether to target the handle or the spout. That choice guides the right steps to fix leaky fixtures without extra parts.

Leak at the handle vs leak at the spout
If moisture shows up around the faucet handle, the problem often lies in worn O-rings or packing. The faucet handle area is where seals fail first.
When water drips from the spout while the tap is off, the shutoff surfaces—washers, cartridges or valve seats—are likely worn. A spout leak needs a different fix leaky faucet path than a handle leak.
Mineral buildup clues and when vinegar soaking helps
Dry the fixture, run water briefly, then watch where wetness returns. That confirms the true leak point and avoids swapping the wrong parts.
In many Lower Mainland homes, scale makes parts look faulty. Soak removable metal parts in white vinegar for several hours to loosen deposits. That can restore a seal and stop some leaks.
“If rubber is cracked or a cartridge is worn, cleaning won’t stop the leak.”
- Quick symptom check: handle-area wetness = O-ring or packing; spout drip = shutoff surface wear.
- When vinegar helps: mineral scale on metal seats and spouts — soak and clean first.
- When to replace: cracked rubber or a scored cartridge — cleaning won’t fix these.
Ready to proceed? Use this diagnosis to jump to the correct section for a cartridge, compression, ceramic or ball model. If you prefer expert help, call us at 604 670 3737 — Lord Mechanical LTD serves North Vancouver and West Vancouver.
Dripping faucet repair for cartridge faucets
Many single‑handle models stop leaking after a simple cartridge swap and careful reassembly. Below we show the safe, step‑by‑step method so you can replace a worn cartridge and test the unit quickly.

Remove the decorative cap and handle screw carefully
Pry off the handle cap with a thin blade under the edge to protect the finish. Remove the hidden screw and lift the handle straight off. Keep small parts on a towel in order.
Release the retaining clip or nut and pull the cartridge up
Clear the retaining clip or unscrew the retaining nut. Grip the cartridge and pull straight up. Wiggle gently if it’s tight — do not twist the valve body.
Replace spout O‑rings and lubricate moving parts
Inspect the spout O‑ring and swivel rings. Fit new rings where worn and apply a thin coat of silicone plumber’s grease to the replacement cartridge body and rings for smooth motion.
Match cartridge length, align tabs, and reassemble
Confirm the new cartridge matches the old one in length and stem end geometry. Align tabs to slots and press the cartridge home without forcing. Reinstall the retaining clip or nut, then the handle, cap and screw.
Restore supply, test and final check
Turn water back on slowly and run the unit for about one minute. Stop and inspect around the spout and handle for any moisture. If leaks persist, call us at 604 670 3737 — Lord Mechanical LTD serves North Vancouver and West Vancouver.
Fixing a leaky compression faucet with washers, stem, and seat checks
When handles ooze or water slips by when off, the stem, washer and seat are the first places we check. Compression models commonly fail at the contact point where a rubber washer meets the valve seat.

Disassemble in the correct order
Remove the decorative cap, then the hidden screw and lift the handle off. Loosen the packing nut with a wrench and pull the stem straight out.
Replace the seat washer and O-ring
Fit a new rubber washer to the bottom of the stem; this is the usual fix for a spout drip. Match the O‑ring size exactly—common fits range from 3/8 to 5/8 inch—and replace if the handle is seeping.
Check retainer ring and valve seat
If the retainer ring or seat is pitted, a new washer won’t seal. Lightly sand the seat with emery cloth or replace the seat to restore contact.
Lubricate and reassemble — snug, not overtight
Apply a thin coat of plumber’s grease to new washers and rings before reassembly. Refit the stem, tighten the packing nut and reinstall the screw and cap. Use the wrench carefully; overtightening can deform a washer and cause future leaks.
| Step | What to check | Quick tip |
|---|---|---|
| Handle removal | Decorative cap, screw | Keep screws on a towel in order |
| Stem removal | Packing nut, stem | Turn nut snug, not brutal |
| Washer & O-ring | Replace with exact sizes | Measure old parts or bring them to the store |
| Seat condition | Pitting / retainer ring damage | Sand or replace seat for a good seal |
If the leaky faucet continues after these steps, call Lord Mechanical LTD at 604 670 3737 — we serve North Vancouver and West Vancouver and can help on site.
How to repair a ceramic disk faucet leak
Even long-lived ceramic disks rely on tiny neoprene seals to hold water where it belongs. When those seals wear or scale blocks the cylinder openings, leaks start despite a solid disk.
Remove the handle and escutcheon to access the disk cylinder
Locate the set screw under or behind the handle. Loosen it, lift the handle off, then pry up the escutcheon cap without scratching the finish. Unscrew the mounting screws and lift out the disk cylinder straight up.
Replace neoprene seals and clean openings with distilled white vinegar
Remove the small neoprene seals and inspect them closely. Replace any that are cracked or flattened with matching new parts.
Soak a soft pad in distilled white vinegar and gently clean the cylinder openings to dissolve scale. Rinse thoroughly so no vinegar or debris remains to affect water flow.
Turn water back on slowly to protect the ceramic disk
Reassemble the cylinder, escutcheon and handle. When you turn water back on, open the shutoff valves slowly to avoid sudden pressure that can fracture the ceramic surfaces.
- Why it works: ceramic disks rarely fail, but seals and scale do.
- Quick check: move the handle to test smooth motion and watch for leaks.
- Tip: a worn cartridge in a nearby assembly can mimic a disk leak—compare parts before you buy replacements.
If the leak continues or you prefer we handle the job, call Lord Mechanical LTD at 604 670 3737. We serve North Vancouver and West Vancouver and can complete the repair on site.
Ball-type faucet leaks and why a full repair kit often saves time
Ball-style mixers hide many small wear points that can cause leaks and odd handle feel. Because a single ball assembly contains springs, seats and seals, we often recommend replacing the entire set of parts in one go.
Access and removal: pry off the index cover, loosen the hidden hex-head screw and lift the handle straight up to avoid rounding fasteners.
Disassemble in order: remove the cap and collar, then take out the cam, washer and rotating ball. Lay parts out in sequence so reassembly is straightforward.
The most common failure is worn rubber seats and weak springs. Install new seats and springs from a complete kit to restore sealing and smooth mixing.
Reinstall carefully: align the ball keyway to the body tab, fit the gasket and cam cap, hand-tighten the cap, then use a small spanner or wrench to set tension. Too loose leaks; too tight binds.
If you prefer expert help, call Lord Mechanical LTD at 604 670 3737. We serve North Vancouver and West Vancouver and can complete the job on site.
Reassembly, testing, and making sure the drip is actually gone
A methodical reassembly is the difference between a short fix and a return call. Take a few deliberate minutes to check alignment and seals before you finish. That small care prevents most future problems.
Run the unit and inspect for any remaining leaks
Once you reassemble, turn water back on slowly. Run hot, cold and a mixed stream for about one minute to stress each path.
Shut the tap and inspect the spout and handles for fresh moisture. Check under the sink for hidden seepage.
Grease, protect finishes and use the right torque
Apply a thin coat of plumber’s grease to O‑rings and moving interfaces to reduce wear and help seals last. Grease keeps parts moving freely and cuts friction.
When using a wrench, wrap a soft cloth around the metal to avoid scratches. Tighten snugly but avoid overtightening — excessive force can deform seals and cause new leaks.
- Repeatable test: run water ~60 seconds, shut off, then inspect spout and handles.
- Why test mixed flow: some faults only show under combined pressure or temperature.
- Time check: if reassembly is taking too long, pause and verify part alignment and fit before forcing anything.
If leaks persist after correct reassembly, you may have a worn valve seat or internal body damage. Call a qualified plumber — Lord Mechanical LTD serves North Vancouver and West Vancouver. For fast help, call us at 604 670 3737.
When to call a plumber or replace the faucet instead of repairing
Not every leak is worth a long DIY fight — knowing when to stop saves time and money. Many common jobs finish in roughly 30–60 minutes. If you are still working after an hour, something has likely seized, mismatched, or failed.
Signs it’s time to stop and get professional help
Look for clear cost‑effectiveness red flags before you buy more parts.
- Severe corrosion or a cracked body that won’t seal.
- Pitted valve seats that don’t smooth with light sanding.
- Repeated leaks after new parts or unavailable/obsolete components.
- Cartridge cost approaches or exceeds $50–$100, tipping toward replacement.
When replacement makes more sense
Faucets older than 10–20 years often have hidden wear or non‑standard parts. If the body is damaged or the cartridge price is high, a full replacement is usually the smarter long‑term choice.
Get expert help fast
For tight cabinets, complex layouts or commercial sites, a licensed plumber reduces downtime and risk. We service North Vancouver and West Vancouver and offer clear cost comparisons so you can decide.
“Many common repairs should take roughly half an hour to an hour; if you’re hours in, call a pro.”
Get expert help fast: call 604 670 3737 (or dial 6046703737) to book Lord Mechanical LTD for prompt, local service.
Conclusion
Acting quickly on a leak keeps water use low and avoids bigger plumbing work later.
We sum up the path: shut the supply, identify the valve and faucet type, find the leak source, replace the worn part, then test the flow methodically. Most fixes target predictable wear items — washers, O‑rings, cartridges or valve seats — so a focused approach usually stops a leaky faucet fast.
Reassemble with care: gentle tightening protects finishes and prevents seal deformation that causes repeat leaks. If the dripping faucet is old, corroded, or still leaking after a careful attempt, professional plumbing is the fastest route to a lasting result.
For a guaranteed fix in North Vancouver or West Vancouver, call Lord Mechanical LTD at 604 670 3737. We’ll help stop the drip and restore steady flow.