
Did you know a single storm can drop over 50 mm of rain in an hour on the North Shore? That much water can pool in low spots and threaten foundations if it has nowhere safe to go.
We explain the basics clearly so you can decide if a DIY approach suits your property in Vancouver, North Vancouver, or West Vancouver, or if you should call a licensed pro.
A catch basin is an engineered drainage unit that collects rain and snowmelt and routes it through underground piping to a safe outlet. It is separate from your home sewer; storm lines head to storm systems or waterways, not the sanitary sewer.
We set expectations up front: this is a non-pressurised drainage project that still needs accurate layout, correct grade, and careful backfill. Get those three right and you maximise the long-term advantages — less pooling, lower risk of water damage, and better site performance in our wet coastal climate.
Before digging, locate underground utilities and confirm local drainage rules. If you prefer expert support, call Lord Mechanical LTD at 604‑670‑3737 — we work across North Vancouver and West Vancouver to help homeowners and business owners protect their properties.
Key Takeaways
- Stormwater units collect surface runoff and send it to storm systems, not the sanitary sewer.
- Correct location, correct grade, and a reliable outlet are the three success factors.
- Proper work reduces pooling and lowers the risk of water damage to your home.
- Always check local rules and call utility locates before digging.
- For expert help in North or West Vancouver, contact Lord Mechanical LTD at 604‑670‑3737.
How a catch basin works for drainage on Canadian properties
We often see water collect at low points after heavy rain or spring melt. A small recessed unit with a grate gathers that flow, traps coarse debris, then directs the liquid through buried pipework to a storm-approved outlet.
What the unit collects and where the water goes
Surface water enters the grate and drops into a sump where leaves, grit and sediment settle. Clean water then leaves through an outlet pipe to a storm sewer or a low-level watercourse.
Point collection vs broad area solutions
Point collection: a catch basin is ideal for a repeating low spot or a downspout. It handles concentrated flow quickly.
French drain: uses perforated pipe in a rock trench to intercept sheet flow across a yard.
Dry well: stores runoff so it percolates into surrounding gravel and soil where local codes allow.
Why this helps reduce risks
Properly sized units limit flooding, slow erosion channels, and reduce the chance of water seeping into a foundation. If your yard has one persistent puddle, a basin is often the cleanest fix. For a soggy whole lawn, combine systems or enlarge capacity.
- Tip: in heavy coastal storms, capacity matters — undersized systems overflow.
- For a site review, call Lord Mechanical LTD at 604‑670‑3737.
Planning the right location, slope, and outlet point
Choose the right spot and slope first — it decides whether surface water leaves your property or pools at the door.

Find the lowest collection point
Walk the yard during or after heavy rain if you can. Look for the exact point where water and debris collect near driveways, patios, and downspouts.
Pick a safe discharge location
Move runoff away from foundations and neighbours. Avoid places that can refreeze, erode slopes, or flood other lots.
Understand slope and invert elevation
Invert elevation is the outlet level where the pipe joins the basin. It must sit lower than the collecting area so water flows freely.
Set grate height and depth
Set the grate flush with the finished lawn or slightly below a paved surface to capture flow without creating a trip hazard. Balance depth so pipes have cover and consistent fall.
“If the outlet is too high the unit will hold water; if the run has dips, sediment builds and flow slows.”
- Read the ground to locate the lowest point.
- Ensure a continuous downhill grade for pipes — no bellies.
- Confirm the outlet won’t cause erosion or nuisance to neighbours.
| Site factor | Good choice | Risk |
|---|---|---|
| Location | Lowest natural collection point | High flat area that bypasses flow |
| Slope | Continuous downhill grade | Bellies or level spots in pipes |
| Outlet | Away from foundations and frozen zones | Discharge onto neighbour’s lot or erodible slope |
Need help planning on the North Shore? Call Lord Mechanical LTD at 604‑670‑3737 for a site review in North Vancouver and West Vancouver.
Materials, basin types, and components to gather before you dig
Before you dig, gather the right materials so the job runs smoothly and the system lasts. We recommend assembling parts and tools in one place and dry-fitting components to avoid surprises.
Concrete vs metal grates — which type suits your site?
Concrete assemblies are common for residential driveways. They resist freeze/thaw and heavy wheel loads.
Metal grates (steel or cast iron) suit commercial or high-traffic sites where frequent loading is expected.
| Feature | Concrete | Metal |
|---|---|---|
| Durability | High in cold climates | High under heavy traffic |
| Cost | Moderate | Higher |
| Maintenance | Low | Check for corrosion |
Pipe selection and fittings for a leak-resistant system
Use common 4-inch drain pipe for gravity runs in most yards. It provides good flow and resists clogging when sized correctly.
Choose solvent-weld or gasketed fittings and dry-fit before sealing. Remember this is a non-pressurised system, so “leak-resistant” means solid joints and sealed inlet/outlet penetrations to prevent washout and undermining.
Bedding, sealants, and tools to prep the trench and backfill
Stock clear drain gravel and sand for bedding. Gravel around the first section of pipe improves flow and prevents settlement. Keep native soil for topfill.
Have silicone sealant or rubber gaskets on hand; some basins use a flexible sleeve or grooved ring that seals with caulk. Tools to gather include a trenching shovel, level or laser, stakes and string, plastic sheeting for spoil, and a drill for weep holes.
- Pre-dig checklist: basin unit, grate, 4-inch pipe and fittings, gravel, sand, sealant, tools, and locates.
- Dry-fit everything, then final-seal the inlet and outlet to limit erosion.
Need help sourcing parts or planning work in North or West Vancouver? Call Lord Mechanical LTD at 604‑670‑3737 for guidance and supply recommendations.
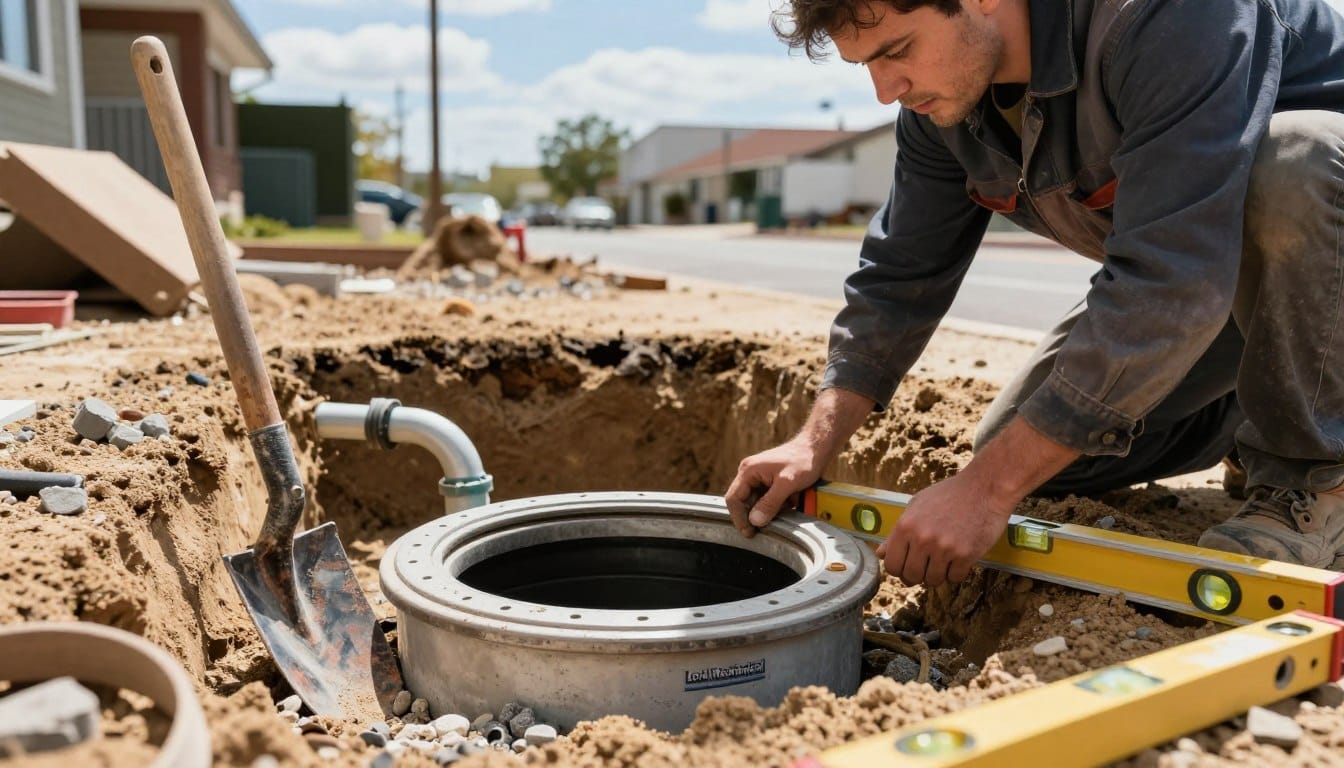
Catch basin installation: step-by-step overview
We start with layout: stake the route, run string lines and lift turf carefully. Place excavated soil on plastic so the yard can be restored quickly.

Excavation and trenching
Dig the hole wide for adjustments and set a gravel base about 6 inches. In some cases add 6–12 inches more for extra bedding and drainage.
Pipe and grade
Trenches should give roughly 3 inches clearance each side of a 4-inch pipe. Depth examples range from ~8 inches to 18 inches with an 8-inch-wide trench where needed.
Connections, weep holes and emitter
Point the bell end upgrade toward the unit, dry-fit parts, then seal inlet/outlet penetrations with silicone or a gasket. Extend the pipe 3–4 inches into the unit and drill weep holes in the bottom so the unit drains between storms.
“Proper backfill and compaction stop future sinkage and keep the system flowing as designed.”
| Step | Key measure | Why it matters |
|---|---|---|
| Gravel base | 6–12 inches | Stabilises unit and improves drainage |
| Trench clearance | ~3 inches each side | Prevents point loads and allows bedding |
| Emitter support | 6 inches gravel below | Prevents undermining at discharge |
Finish with a hose test, then compact backfill in lifts. For professional help on the North Shore call Lord Mechanical LTD at 604‑670‑3737.
Best practices for gravel placement and protecting the pipe run
A well-prepared gravel bed turns a vulnerable trench into a durable, free‑draining system.
Where to concentrate gravel: place most of your drain gravel under and around the catch basin and along the first 1–2 feet of pipe. That zone sees the most flow and the highest risk of settlement. Proper bedding stabilizes the basin and speeds water away from saturated soil.
Support the pipe with compacted gravel so the pipe, not the basin sleeve, carries the load. If the sleeve supports the line, connections can sag and form a belly that traps sediment.
Treat the trench as a system: maintain consistent bedding depth and uniform support along transitions. Avoid sudden drops or level spots. A smooth fall prevents backups and reduces maintenance.
Protecting the emitter and lawn edge
An optional barrier keeps gravel contained and cuts weeds around the emitter. A simple build uses 1×8 pressure‑treated lumber about 18 inches square with a half‑circle cut to seat around the pipe. Pour gravel to just below the emitter lip so pop‑ups can open and the cap stays clear for cleaning.
- Concentrate gravel under/around the basin and first pipe feet.
- Support pipes on compacted bedding, not the basin sleeve.
- Use a small barrier at the emitter to hold gravel and reduce weeds.
Need help on the North Shore? Call Lord Mechanical LTD at 604‑670‑3737 for advice and site support in North Vancouver and West Vancouver.
Testing and finishing so water drains instead of pooling
Before final landscaping, we validate flow with a simple hose test to confirm the drain line moves water as intended.
Hose testing to confirm flow, identify backups, and verify the system level
Run a garden hose into the basin and push water through the pipe. Watch the outlet to confirm steady flow to the discharge point.
Signs of failure include slow drawdown, pooling in the unit, or bubbling from joints. Those usually mean low slope, a trapped low spot, debris in the line, or a misaligned connection.
Test both steady flow and short bursts to mimic roof runoff during heavy rain. If water moves freely and no gurgling appears, proceed to finish.
Final grading around the grate to guide rainwater into the basin
Grade the ground so the grate sits flush or slightly below finished level. That prevents pooling and reduces trip hazards.
Make sure the surface gently pitches toward the opening so runoff finds the intake instead of skirting it. Smooth transitions at driveways and paths improve safety and appearance.
“Good finishing captures excess water consistently, especially during coastal downpours.”
Need help verifying your work on the North Shore? Call Lord Mechanical LTD at 604‑670‑3737 for a site check in North Vancouver and West Vancouver.
Maintenance tips and common DIY mistakes to avoid
A twice-yearly check keeps your drainage running when rain and wind bring leaves and grit.
Seasonal inspections
Inspect in spring and fall for debris, sediment, vegetation and any corroded or loose grates.
Look for settling soil or pooled water near the unit’s bottom — they warn of reduced flow and possible flooding.
Cleaning and flushing
Lift the grate and remove trapped debris by hand or rake. Shovel or vacuum sediment from the sump when needed.
Flush the line with a garden hose to clear fine grit. Make sure the emitter cap is accessible and free of leaves.
Common DIY mistakes and safety
Frequent errors are wrong placement, poor slope and weak connections that separate after freeze–thaw cycles.
Shallow depth can lead to crushed pipe or freezing; deeper trenches may be necessary to keep a steady grade.
“If you repeatedly see standing water after rain, the system needs cleaning or redesign — not another quick patch.”
| Issue | What to check | Fix |
|---|---|---|
| Blocked grate | Leaves, debris mat | Lift grate, clear by hand |
| Sediment build-up | Sand at bottom | Shovel or vacuum; flush pipe |
| Poor slope/connections | Slow drawdown, gurgling | Regrade run; reseal joints |
Make sure to locate utilities before any digging — strikes risk injury and fines.
For help with inspections, cleaning or a site review in North or West Vancouver, call Lord Mechanical LTD at 604‑670‑3737.
Conclusion
D smart grading and a secure outlet turn an occasional puddle into a solved problem for your place. We stress a strong, practical approach: find the low spot, keep a steady fall, and direct water to a safe outlet.
Good drainage protects your home and reduces the chance of standing water near a gutter downspout. Managing excess water lowers soft spots and long‑term moisture risk around the foundation.
The real advantages are fewer puddles, less erosion, better yard use and reliable performance during heavy storms. Systems succeed on details: gravel support, sealed penetrations, correct grate grading and routine maintenance.
If you’re unsure about outlet routing or utility conflicts, get expert help. For planning or professional installation support in North Vancouver and West Vancouver, call Lord Mechanical LTD at 6046703737.